
 Leistungsstarker Start der Wohnungs-Proxy-Lösung!70M+ konforme Quell-IP-Adressen – stärken Sie Ihre Web-Scraping-Projekte mit $0.8/GBJetzt kaufen



 Daten für KI













 Zurück
Sub-account Addition Guide
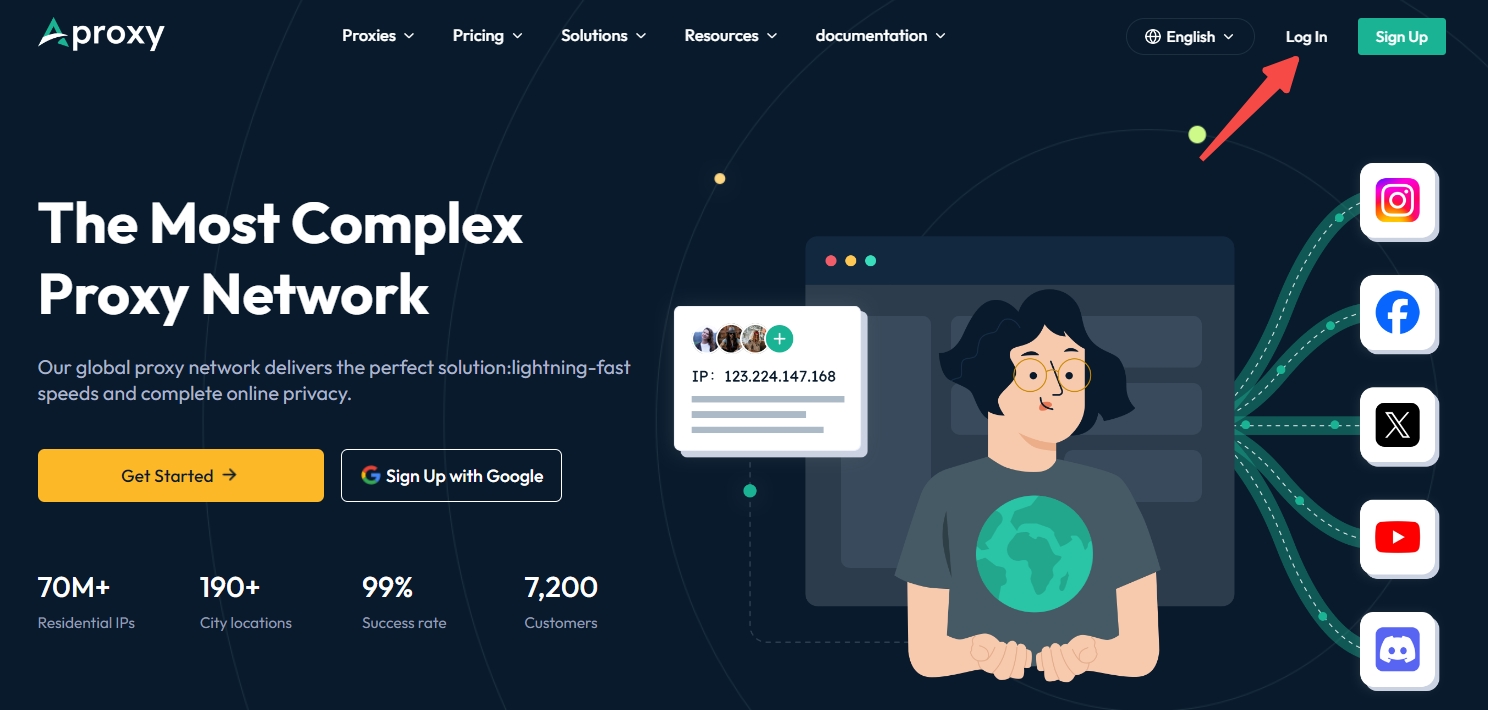
1. Enter the Aproxy official website and click on "Log In" at the top right corner, or click here.
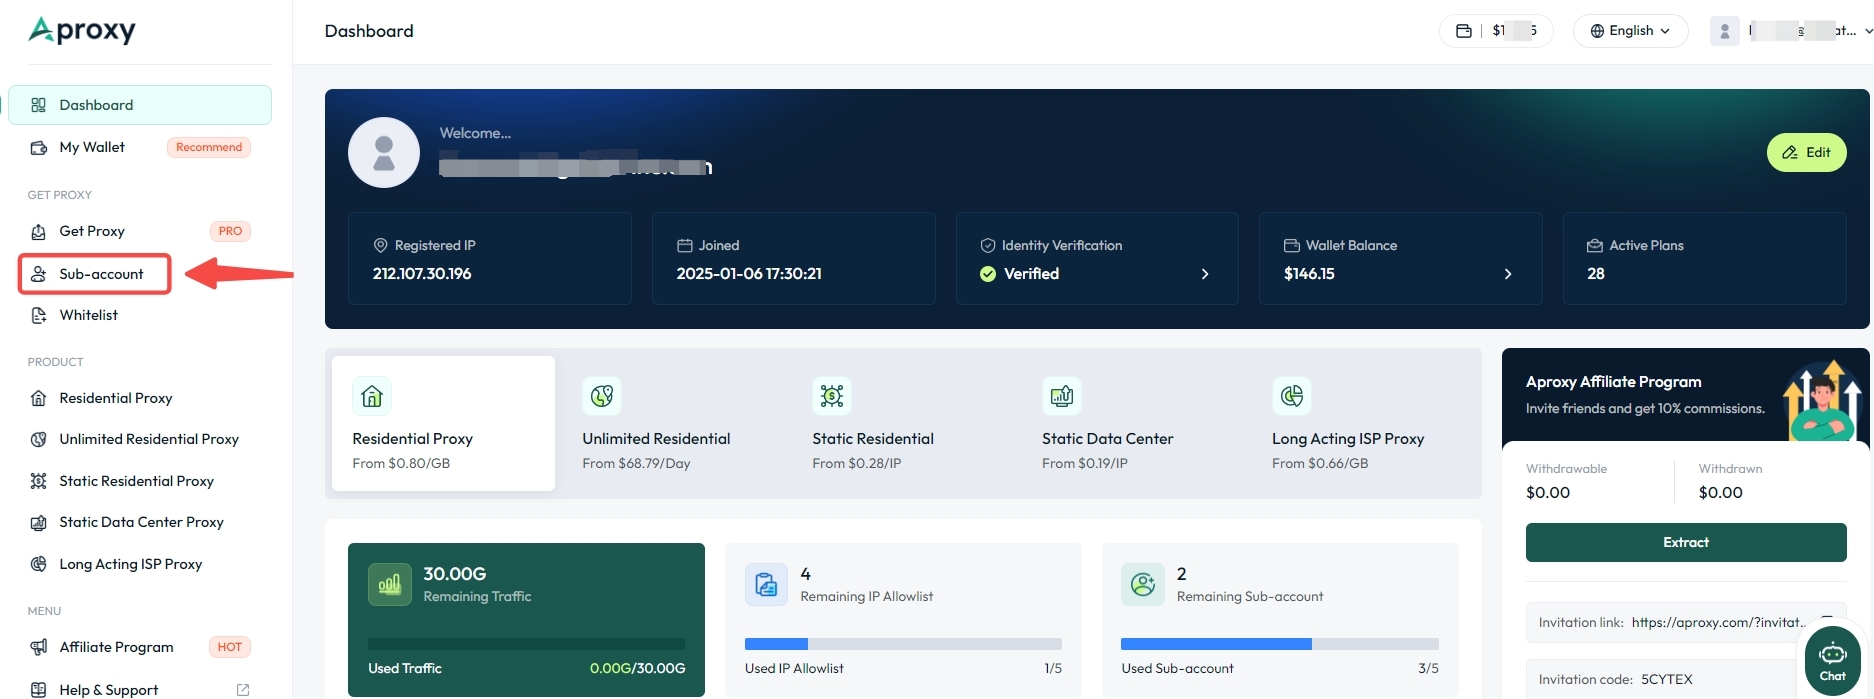
2. After logging in, you will be automatically redirected to the account page. Click on "Sub-account" on the left to enter the sub-account management page.
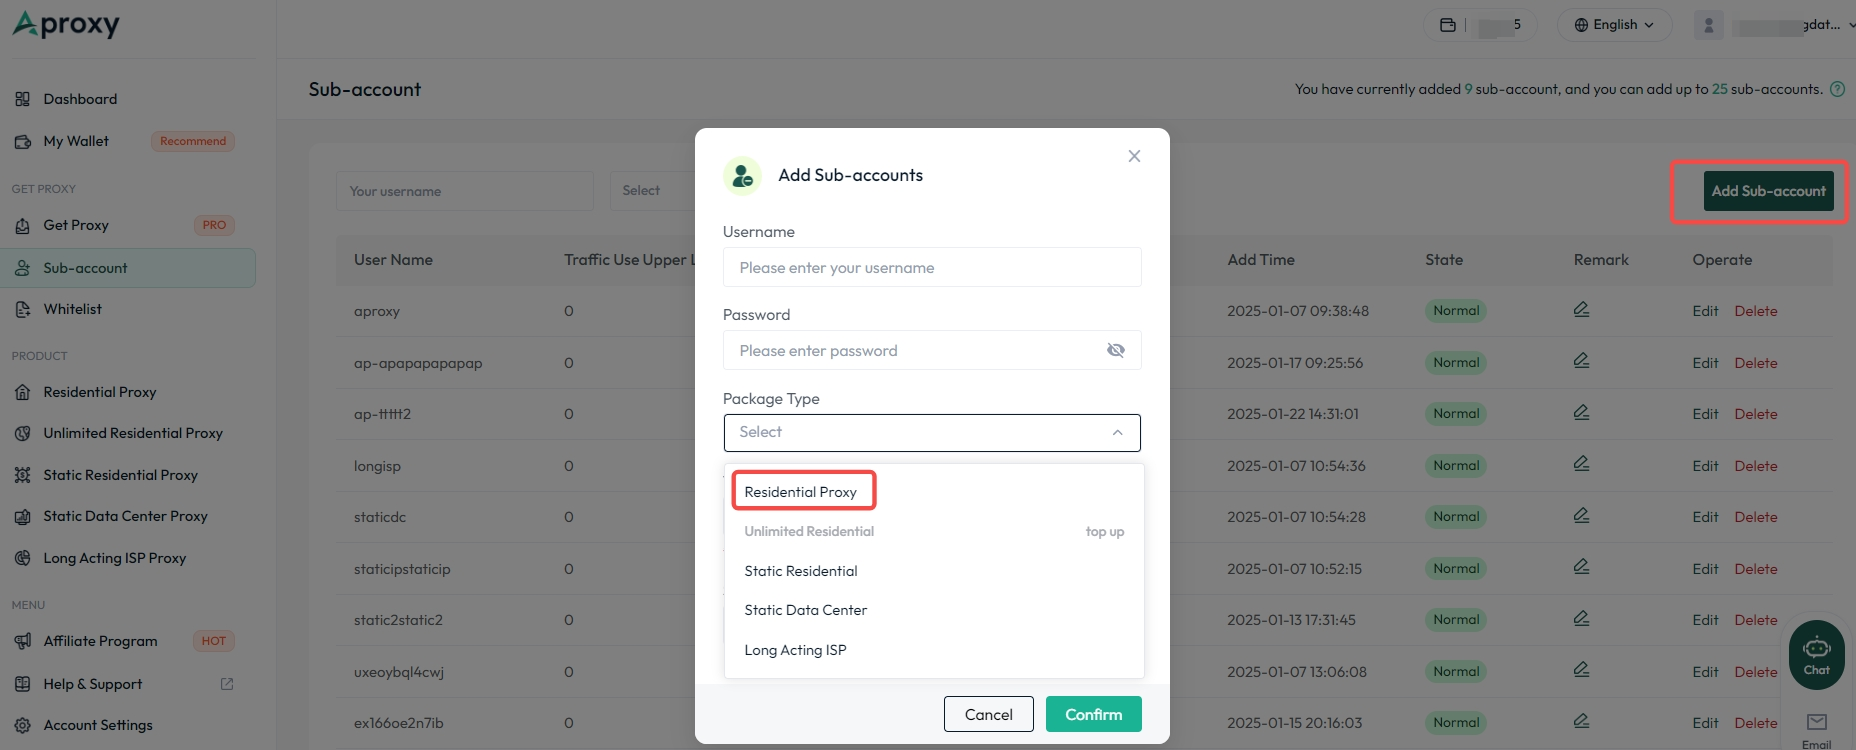
3. Click on "Add Sub-accounts" at the top, and a pop-up window will appear. Fill in the sub-account’s "Username" and "Password" in the pop-up (Note: the proxy account name cannot be purely numeric, and the password length should be between 6 and 15 characters). Then, select the plan type for the sub-account to be added. Here, we use "Residential Proxy" as an example. After completing the settings, click "Confirm" to finish.
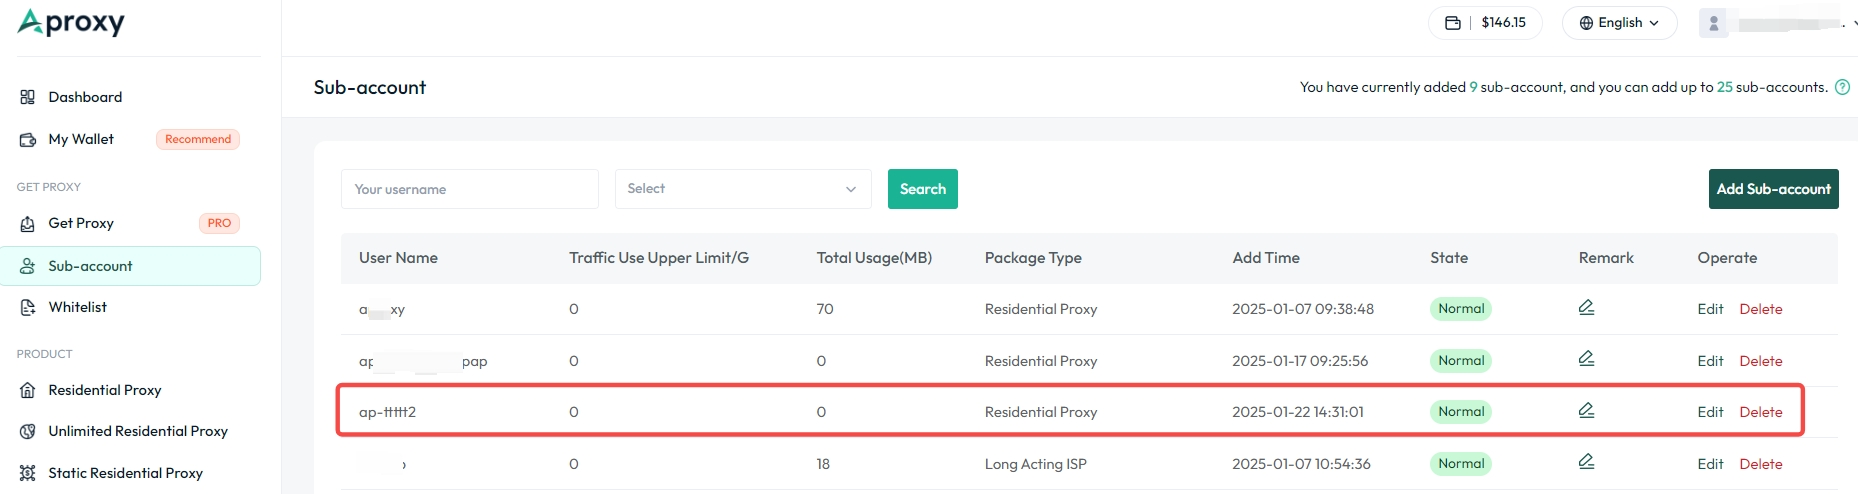
4. Now, you have successfully added a sub-account. You can also edit its status and set the traffic limit on the right.
 Updated 1 year ago
 Unlimited Residential Purchase

 ISO/IEC 27001:2017 zertifiziertes Produkt


