
 Ra mắt mạnh mẽ Proxy Cư Trú!70M+ địa chỉ IP nguồn tuân thủ, nâng cao dự án web scraping của bạn với $0.8/GBMua ngay



 Dữ liệu cho AI













 Mặt sau
Google Chrome Proxy Configuration Guide
Before configuring the proxy, please purchase a proxy [Residential Proxy Purchase Tutorial], and extract the IP address [IP Address Extraction Tutorial].
Here, we use an example of setting up and using residential proxy account and password extracted IP.
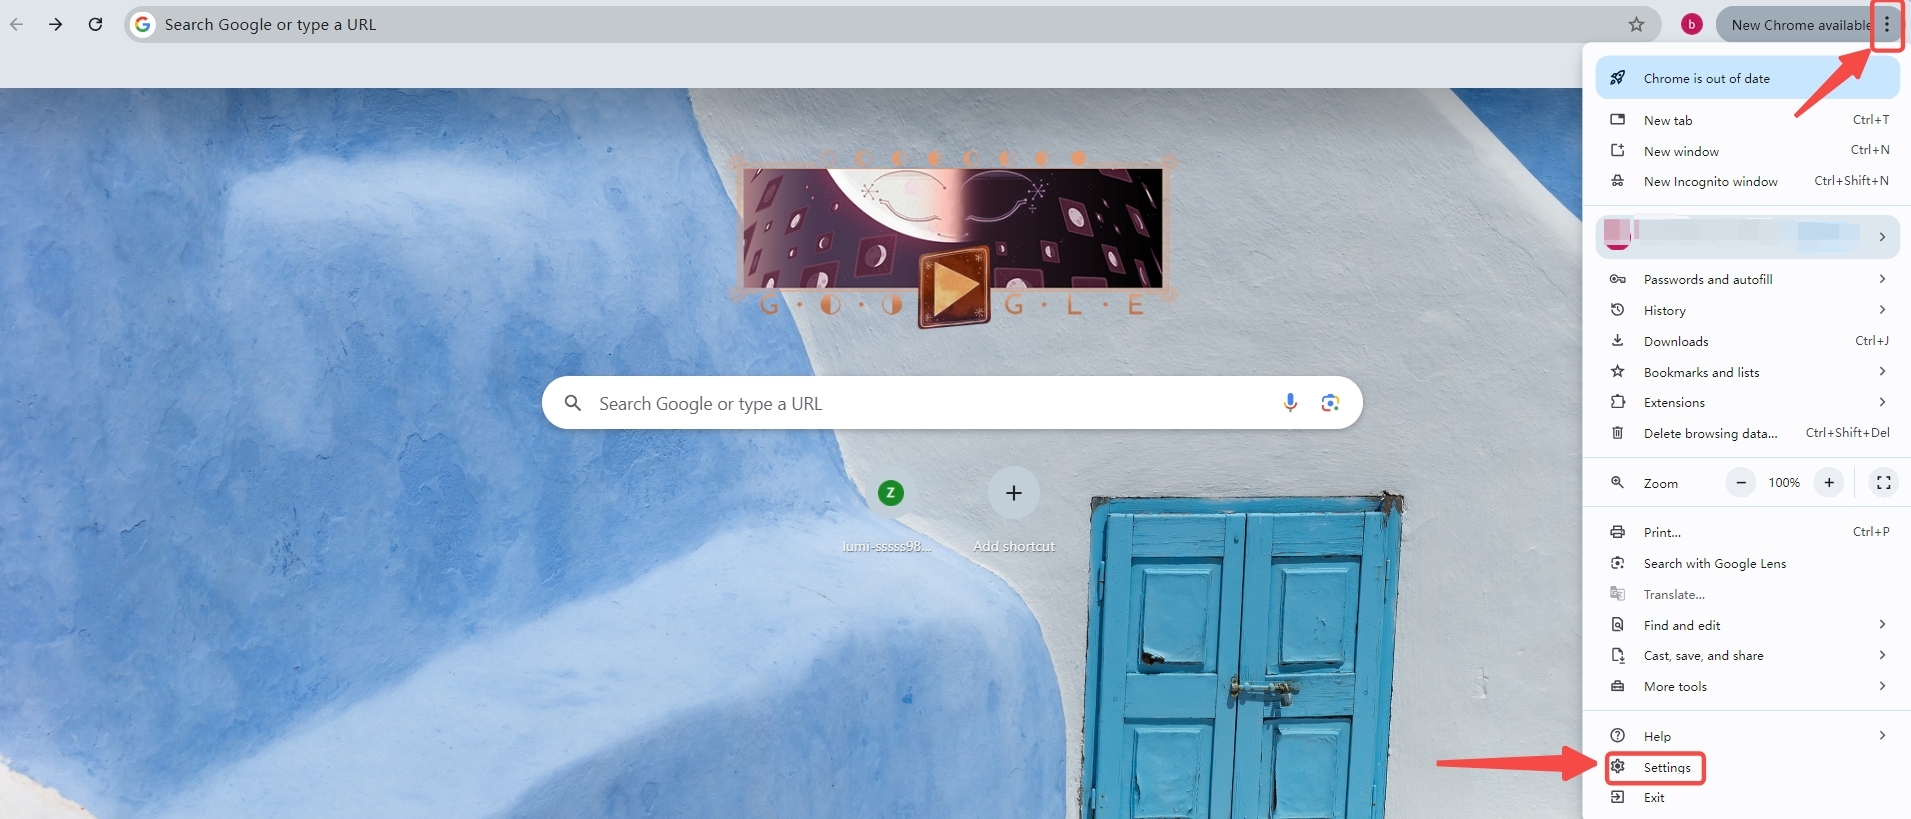
1. Click here to download and install Google Chrome. Then open Google Chrome, click the three-dot icon in the top right corner, and select "Settings."
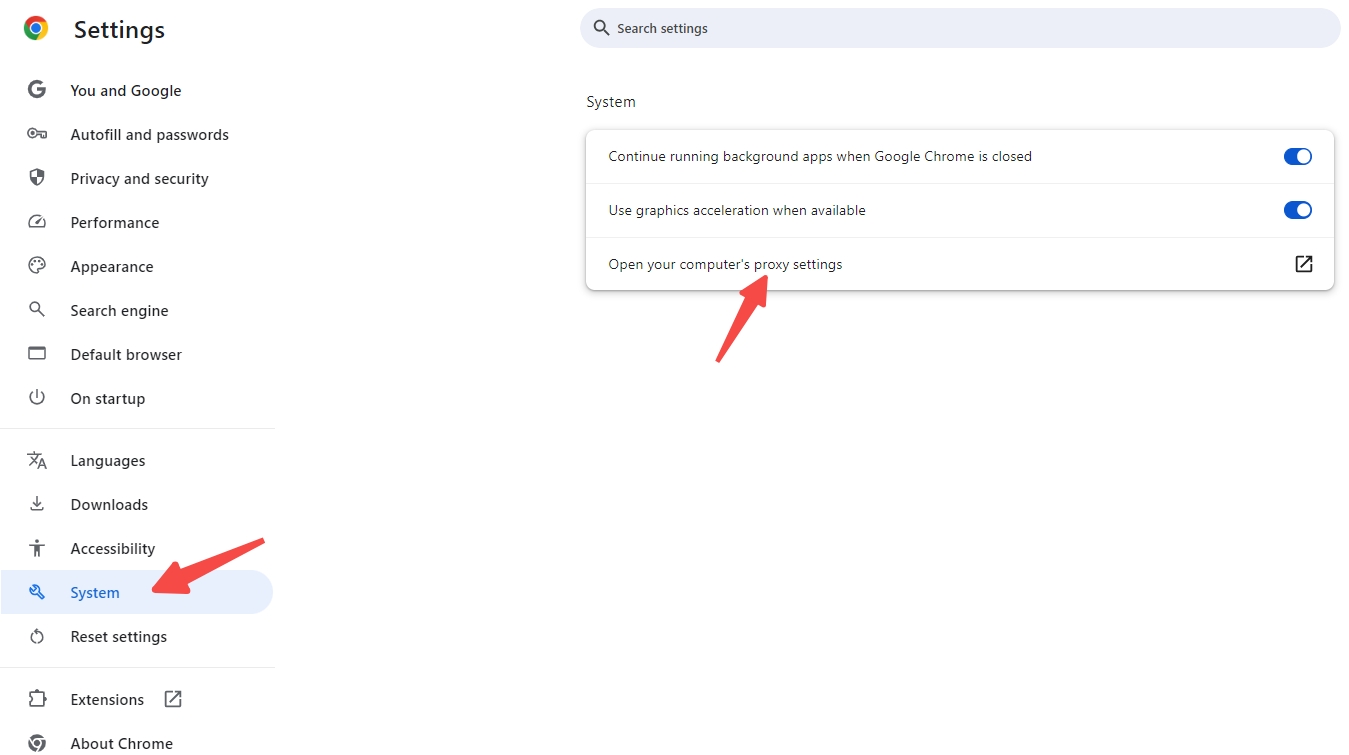
2. Click "System," then click "Open your computer's proxy settings." This will open the computer's network and internet settings page.
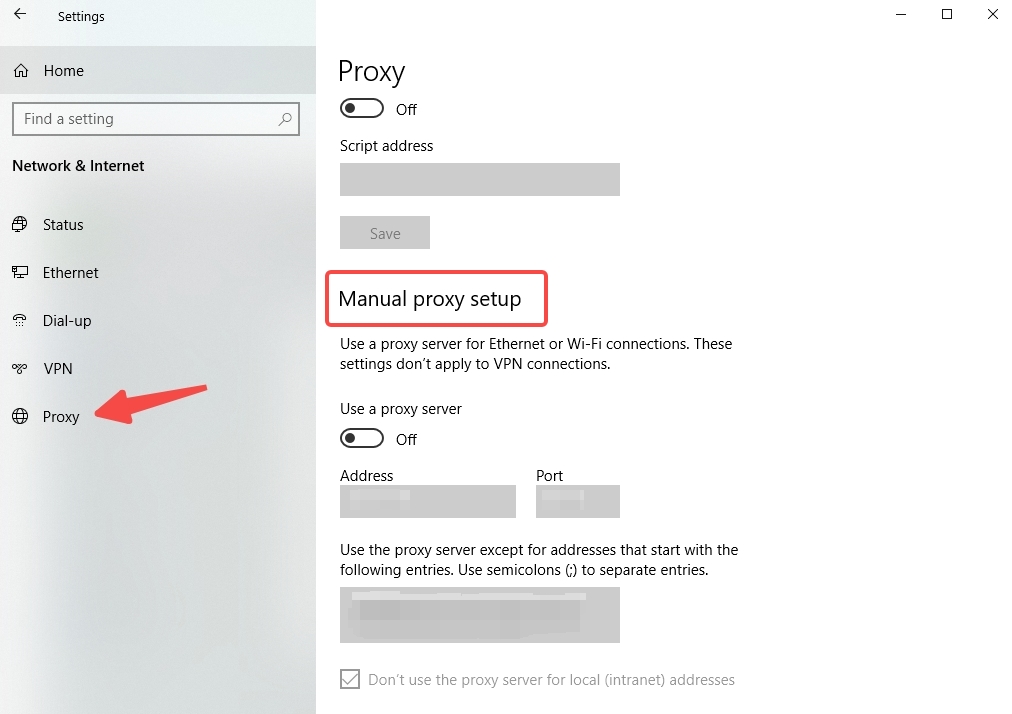
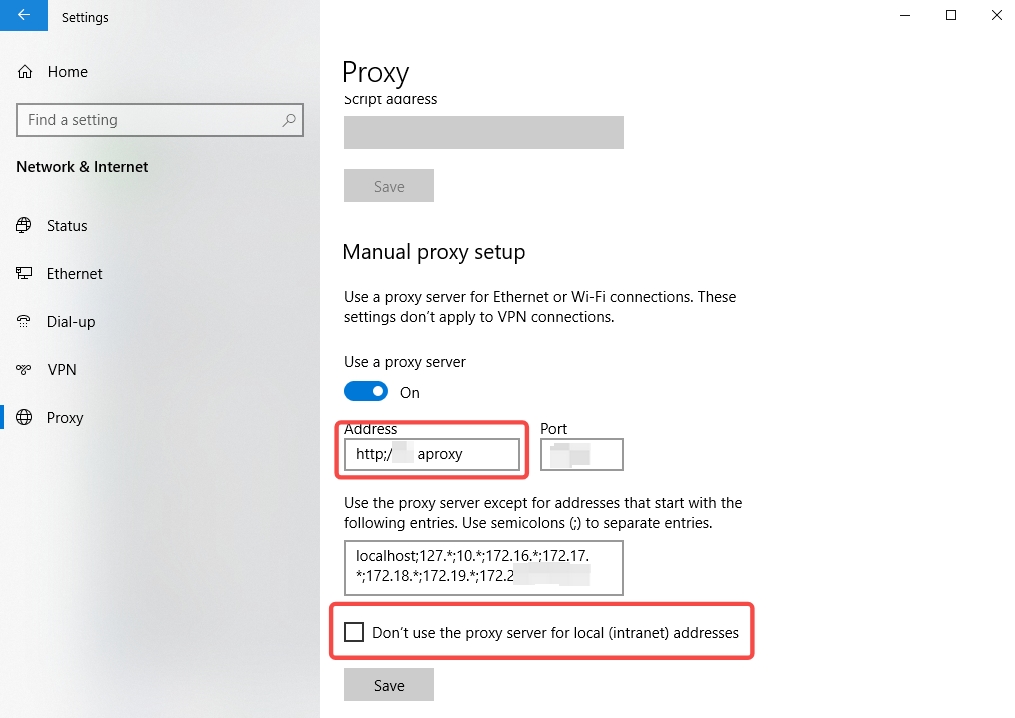
3. Click "Proxy" .
4. Enable “Use a proxy server.”
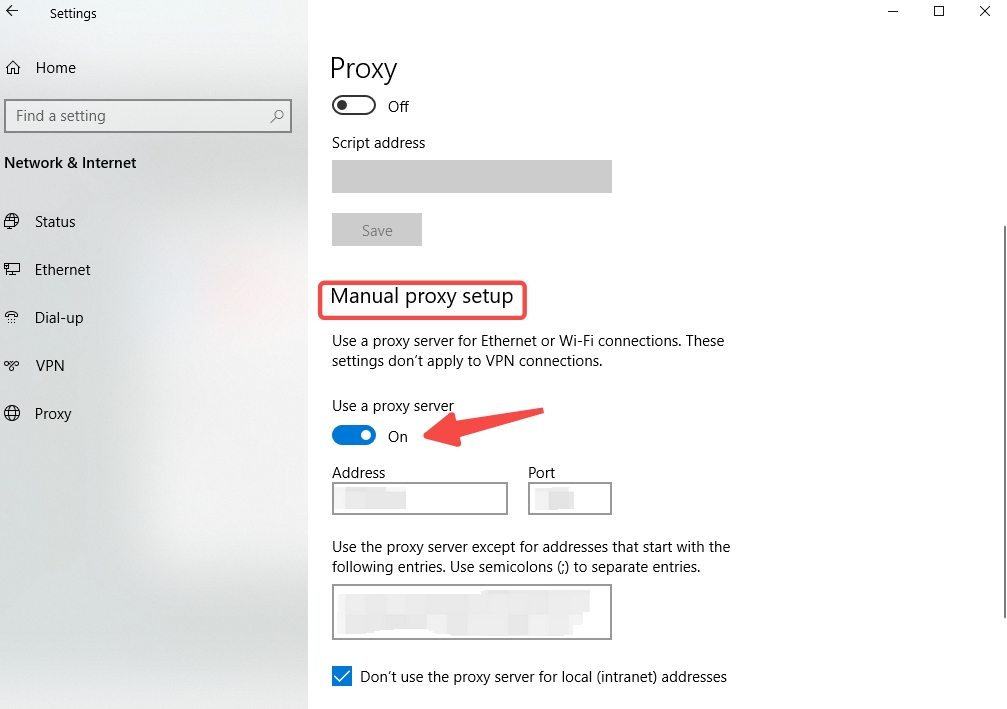
5. Enter the generated “Address” and “Port” you just copied, then click "Save" at the bottom. (Note: The option "Don't use the proxy server for local (Intranet) addresses" is primarily used to ensure that the proxy does not interfere with your access to local network resources (e.g., company intranet or local devices). If you only want the proxy to be used for accessing external websites without affecting the local network connection, it is recommended to check this option. If you need the proxy to cover all traffic, including access to the local network, do not check this option.)
6. After the settings are complete, open the browser window and visit an IP address detection website. In the pop-up window, enter the sub-account name and password, and click "OK."
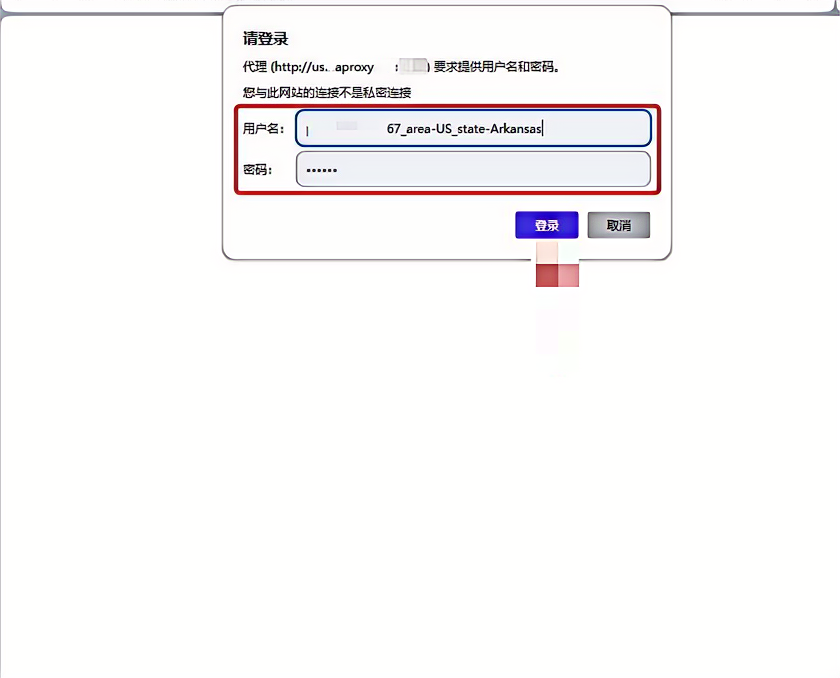
7. Confirm if the displayed IP address has changed to the proxy server's IP address. Finally, visit other websites to test the connection, ensuring that everything is working correctly.
 Updated 1 year ago

 Sản phẩm được chứng nhận ISO/IEC 27001:2017


